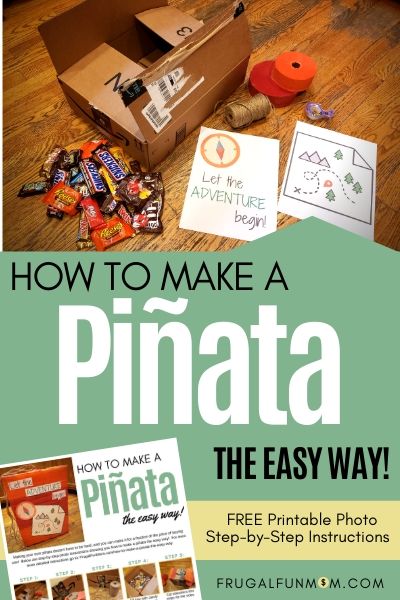
Wondering how to make a piñata? Don’t miss these easy tips that will show you how to make a piñata for your next party without stressing you out!
In fact, are you wondering how to make a piñata the easy way? I was too, so I decided to figure it out and have come up with a handy printable on How To Make A Piñata The Easy Way.
The great news, making a piñata is not that hard either, and it will save you a lot of money on your next birthday party!
I’m going to give you step-by-step instructions on how to make your own piñata – so keep reading!
WISH PLANNING A PARTY WAS A PIECE OF CAKE?
Just Send Me My Free Pinata Instructions
I know you are busy and may not have time to read this full post. I get it! Just sign up below and I’ll be happy to email your step-by-step photo instructions on How To Make A Piñata right now!
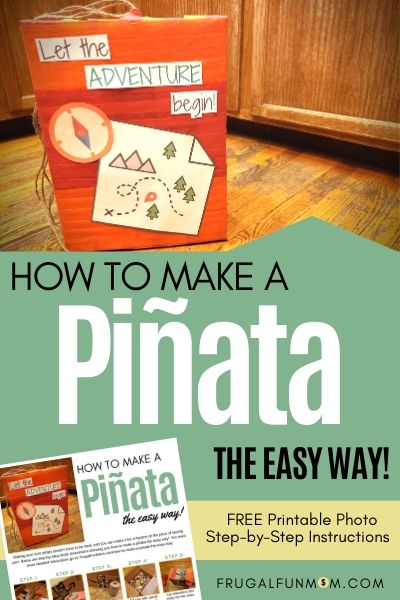
Want to remember this post? Pin this post, How To Make A Piñata The Easy Way, to your favorite Pinterest board right now!
Control Costs By Hosting At Home Parties
It’s no secret, I love kids birthday parties and love to host them at home. People ask me all the time how I do it? How could I possibly enjoy having a bunch of little kids over, hyped up on sugar running through my house for a birthday party?
I’ll tell you, that’s not the part of a birthday party that I enjoy! Yes, there tends to be the crazy, hyped up part of a party, but there is a way to do an at home party that doesn’t create so much chaos.
Control costs by hosting birthday parties at your home! Share on XFor me, I love doing at home birthday parties for my kids because I can control the cost. There are so many fantastic ways to host an at home party that won’t break the bank! One of the big expenses of hosting a birthday party is the piñata, especially if you want a really cool one. And, what’s a kids birthday party without a piñata – right?!
I mean what kid doesn’t love taking a bat and whacking the side of a box hoping to break it open to reveal the mother of a all gifts – CANDY! I mean, when else will your mom give you a bat and tell you to go break something?
I’ve spent many hours in the past making piñata’s – long before I knew the simple trick of how to make a piñata the easy way! Trust me, there is a trick to making a piñata the easy way – in fact, there are a couple tricks.
Make a pinata the easy way! Get FREE printable step-by-step instructions now! Share on XTricks To Making A Pinata The Easy Way
- Use a box. I like to use an Amazon box. It doesn’t matter what shape, as long as it’s some type of square or rectangle. The easiest way to make a pinata is to choose one that uses a square or rectangle shape, so you can keep the integrity of the box. What I mean, is rather than make the shape of a circular donut, instead make a box of a whole bunch of donuts, so you can use a rectangular box.
- Use Strong Rope. You need to make sure you use pretty strong rope to hang the piñata with. One time, not too long ago actually, I made a great piñata for my son’s birthday party. The rope I used to hang was actually twine. While it looked really cute and rustic, my son and his friends took only a few whacks at it, and the rope broke and the whole pinata fell to the ground – without breaking open. Just make sure you use really strong rope.
- Reinforce The Rope. Make sure you reinforce the area you will hang the rope from so the piñata will hold up to being whacked a whole bunch of times! Another mistake I’ve made is to not reinforce the part of the box where the rope will hang and the piñata breaks right off the rope and falls to the ground. You will want to reinforce the box with extra duct tape so it will hold up.
- Don’t Overfill Your Box. It’s very easy to make your box too heavy and it will either break the rope, or the box will fall right off the rope. Fill it about ½ way full, unless you are using a lot of filler items that are not very heavy (like stickers, small plastic toys, tattoos, etc).
Free Printable Pinata Instructions
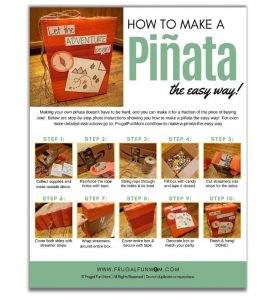
Now let’s get to the real reason you clicked on this post – How To Make A Pinata The Easy Way. I don’t know about you, but sometimes I find it really hard when I’m creating something new, and I have to keep referring to my phone or computer screen to read the next step in the instructions.
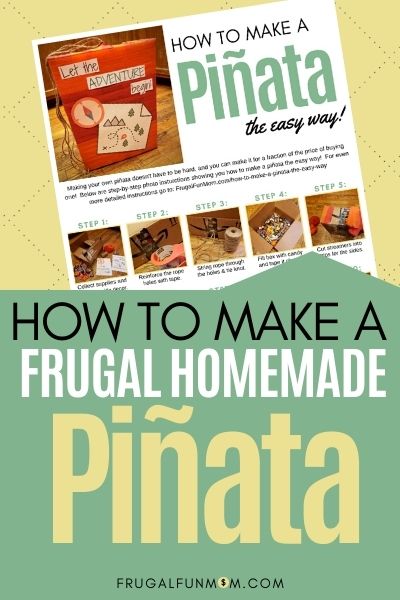
I think it would be really nice to have step-by-step photo instructions to refer to, of how to make a piñata, printed out on paper. Lucky for you, that’s just what I’ve made! If you’d like the printable version of How To Make A Pinata The Easy Way, just sign up below and I’ll email it right to you!
How To Make A Pinata The Easy Way
Step 1: Collect Supplies
Find a square or rectangle box and streamers that you want to use to cover your box. You will also need candy and filler items you want to put inside your box. Next, you need to make the design you want on the outside of your box.
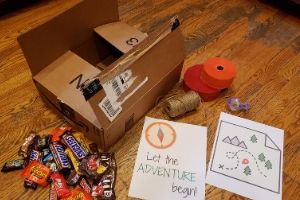
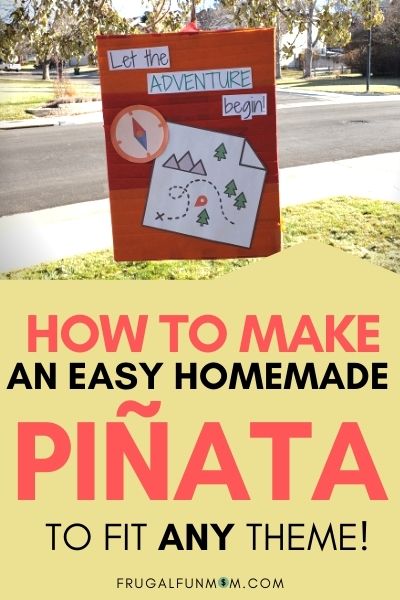
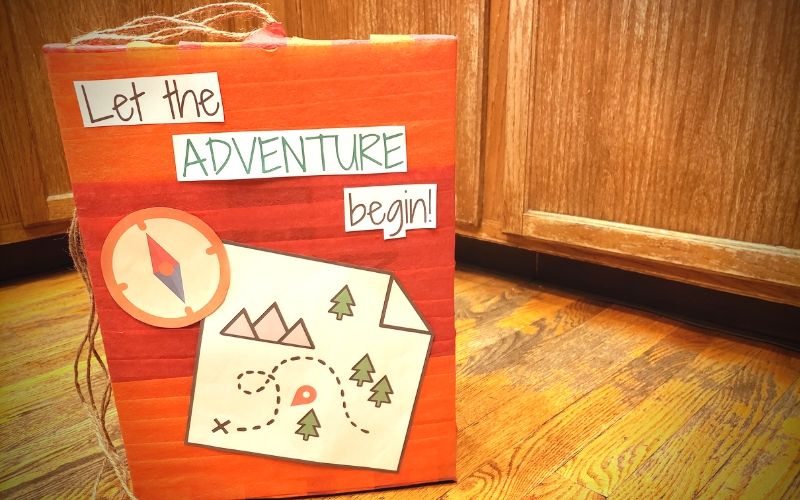
For this tutorial, I’m making an Outdoor Adventure piñata that resembles a treasure map. I’m using the same graphics that I used for the party invitations and just continuing the design throughout the party to the piñata.
I simply used Canva to create my design, and just printed out the artwork as big as I could on an 8.5 x 11 sheet of paper and then cut them out.
Step 2: Reinforce the Rope Holes
Make sure to use tape to reinforce the spot where you plan to put the rope. I used packing tape and taped both the inside of the box and the outside of the box to reinforce where the rope would go so that the rope would not break right through the box. I’d suggest using even stronger tape, like duct tape for this step if you have it.
Step 3: String Your Rope
Once your box is reinforced, cut two holes about 1 inch apart and string your rope through the holes and tie a knot. Use strong rope so that the rope doesn’t break when the kids are taking whacks at the pinata. Trust me, I’ve had this happen and it wasn’t as fun as having the pinata open while it was still hanging.
**If you want to see photos of each step, sign up below to get my free How To Make A Pinata The Easy Way instructions emailed right to you.
Step 4: Fill Box With Candy
Fill the box with candy and tape it closed. Don’t make the box too heavy or it might break the rope before it’s hit open by the kids. If you are using a lot of little filler items that are not candy you might be able to fill it the box fuller because those things don’t weigh too much. If you are using all candy, make sure you only fill it ½ full so it’s not too heavy.
Trust me, I did this. When I made this piñata , I filled it too full of full-size candy bars (after all, 8 year old boys want big candy – right?!), and after just a few hits, the rope broke because the piñata was so heavy! After you fill it, tape it closed.
Step 5: Cut Streamers For Sides
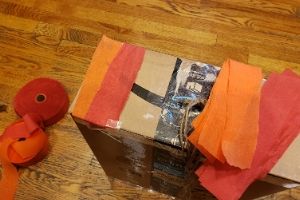
Next, you will need to cut smaller strips of streamers for the top and bottom of the box. Start with the top where the rope is and tape streamers to the sides, overlapping the sides, but make sure the rope is still visible.
Step 6: Cover Both Sides
Flip the box over and do the same thing to the bottom side of the box. Cut streamers and tape to the side covering the whole bottom of the box.
Step 7: Wrap Streamers Around The Whole Box
Now, take the roll of streamers and without breaking the streamer, start wrapping it around the whole box, keeping it pretty tight. I alternated colors by wrapping a third of the box with orange streamers and taping it off. Then I took red and wrapped it around the box where I left off and finished again with orange.
Step 8: Cover Entire Box
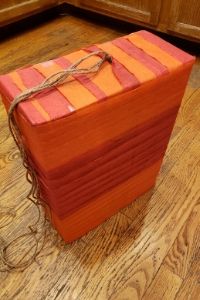
Once you cover the entire box, secure with tape. Looking good huh?! You are almost done!
WISH PLANNING A PARTY WAS A PIECE OF CAKE?

Step 9: Decorate The Box
Using the graphics you created in Canva, decorate the front of your box. Keep in mind, you don’t have to use Canva to create graphics for the front of your box.
You can draw something on paper and glue it on, or just print a clipart image or design off of Google. This is also the prefect time to add glitter! Whatever you to do, just get your box decorated.
Step 10: Finish & Hang!
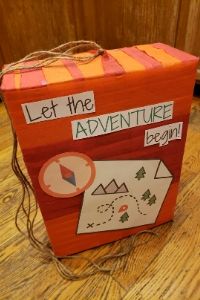
You are done! Way to go! That looks awesome! Now hang it up and get ready for all the kids at your party to have a blast! That wasn’t too hard was it?!
See, I told you making your own piñata wasn’t too hard! I’m so proud of you, and think of how much money you just saved making your own piñata!
Way to go momma! You will easily save yourself $20-30 because you won’t need to go buy a piñata from the store. Just remember, the easiest piñatas are the ones made from a square or rectangle box.
Making your own pinata is easy, frugal, and fun! Share on XWhen you are trying to decide what kind of piñata to make, just make something that goes along with your theme that you can make from a square or rectangle box.
Sign Up For Free Step-by-Step Photo Instructions
Don’t forget to sign up for your free printable PDF step-by-step photo instructions right now! You an print them out and refer to them when you are making your piñata – which will be really helpful!
I can’t wait to see what your piñata turns out like! Post a photo on my Facebook page or comment below and tell me all about it! Hugs!
More Frugal Birthday Party Planning Posts
I have a bunch of frugal birthday party planning posts! Here are few of my favorites – they will be sure to help you plan a frugal fun birthday party for your child!
- One & Only Theme That Fits Any Kids Birthday Party – how to come up with awesome games to play at ANY birthday party!
- Best Boy Birthday Party Themes– awesome theme ideas for boy at home birthday parties!
- How To Throw Two Birthday Parties On The Same Day – ideas for how you can host two parties on the same day to not only save time, but also a lot of money!
Other Party Planning Tools You Might Like:
Speed Party Planning Checklist
Wondering where to begin when planning a party?
If you want an easy tool that can help you begin the planning process for your next party, then our Speed Party Planning Checklist is the perfect first step!
Plus, it’s my gift to you – hurry, it’s only free for a limited time! You can grab it here.
Speed Party Planning Tool Kit
It’s no secret that having all the nitty gritty details organized for your upcoming party will help you feel calm, relaxed and ready to focus on the fun!
This tool kit includes 6 party planning worksheets, including our wildly popular Speed Party Planning Checklist! Plus, a lot of extra resources.
This pack of resources will help you organize and plan your party details fast – in less than an hour!
Choose Your Party Guide
Our must-have guide includes three completely planned party plans leaving you with only one decision – simply picking which one works best for you & your child!
Planning your child’s birthday party doesn’t have to be stressful – if you have the right tools! Yep, you can throw an in-home party without spending a lot of money, and I promise you won’t lose your mind in the process!
In fact, you’ll be super proud of yourself!
WISH PLANNING A PARTY WAS A PIECE OF CAKE?

Instant Party Toolkit
Did you wait until the last minute to put your child’s birthday party together? Our Instant Party Toolkit is just what you need! This bundle of essential printables is just what you need to throw a fabulous party for your child in an hour or less, and includes
This digital toolkit is full of printables you can simply print out and know you have everything you need from decorations to invitations done and ready to go!
If you wish party planning wasn’t so hard, and want to finally learn HOW to plan a party the easy way, you’ll love this system! In this system I teach you 8 lesson on how to plan all aspects of a party the way I do it!
FAB Party Planning System is just what you need to plan amazing parties for years to come!
Want to remember this post? Pin this post, How To A Pinata The Easy Way, to your favorite Pinterest board right now!

