This post may contain affiliate links. Read my disclosure policy here.
Looking for ideas on how to make homemade birdhouses for kids? This is another fun activity to do with your kids this summer! My kids are obsessed with wildlife being in our yard, and after we made Cookie Cutter Bird Feeders a few weeks ago, we now have a ton of birds in our yard. Don’t miss these fun ideas on how to make milk carton birdhouses with your kids!
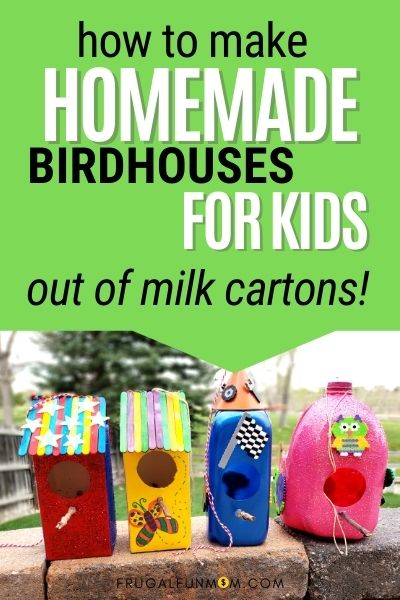
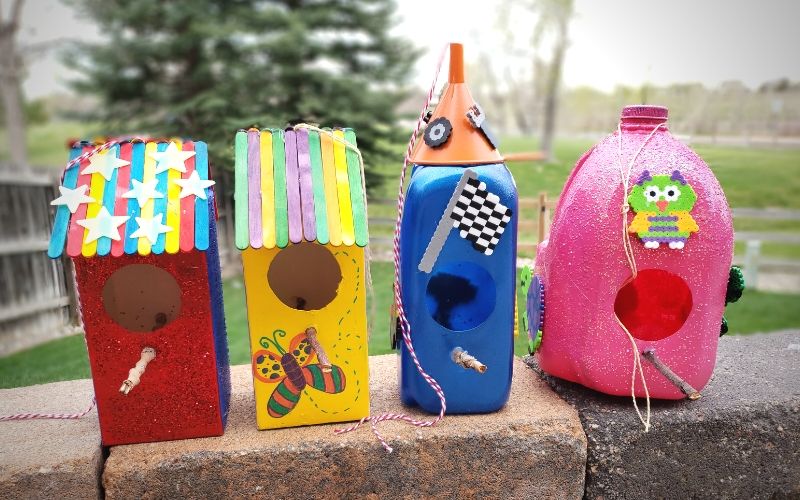
We decided it was the perfect time to make some homemade birdhouses for kids, with the hopes that some of the visiting birds would make a nest in our yard for the summer. Hang on and I’ll show you how we made four very frugal homemade birdhouses for kids out of stuff we already had at home!
Trust me, they came out soo cute! Keep reading and I’ll give you a list of supplies we used, as well as some supply alternatives in case you don’t have the same stuff we did, and directions on how to make homemade birdhouses for kids. Plus, I’ll include lots of photos so you can see just how we made ours!
WISH PLANNING A PARTY WAS A PIECE OF CAKE?
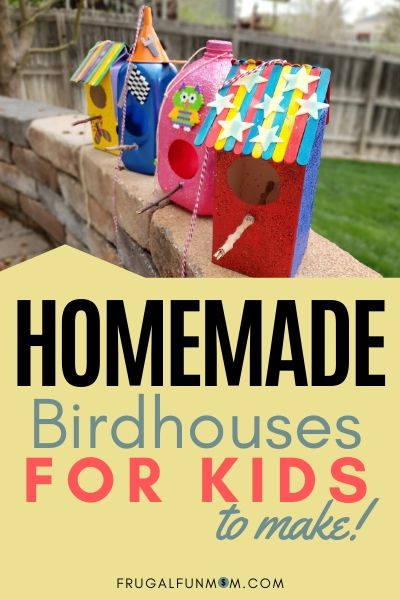
Want to remember this post? Pin this post, Homemade Birdhouses For Kids To Make, to your favorite Pinterest board right now!
Before You Begin Making Birdhouses
Before you begin to make your homemade birdhouses for kids, here are a few things to keep in mind. First of all, I’m a stay at home mom of three kiddos and it’s my passion in life to remain a stay at home mom, and help other moms, just like you, afford the stay at home mom life.
With that in mind, you must know, that that if you don’t have the exact supplies we used, that’s ok! Improvise! Get creative and just use what you do have! I’ll try to provide as many supply alternatives that I can think of, to help you save money on your homemade birdhouses for kids.
3 Different Types of Homemade Birdhouses For Kids
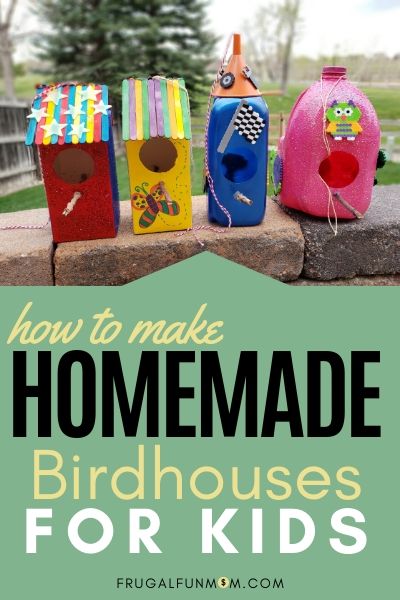
We made three different types of homemade birdhouses for kids. We chose to make these 3 types of birdhouses because of the supplies we found lying around the house.
Planning Is Essential
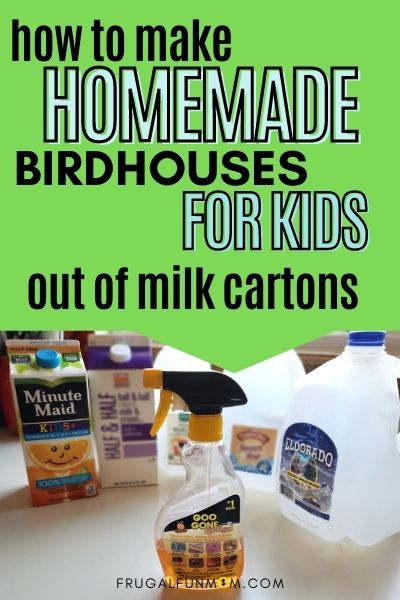
Before you tell your kids that you are going to make homemade birdhouses with them, make sure you start collecting supplies. Or maybe you are one of those moms who saves a lot of stuff and already has milk cartons, milk jugs, or orange juice containers lying around?
I didn’t have any of these things – but I did in my refrigerator, so we had to wait a few days until we used them up before we could make our birdhouses. While we waited, I also asked my neighbor if she had any cartons we could use and boy did she! The next thing I knew, we had all sorts of shapes and sizes to choose from!
Save All Types of Cartons
In the end, we decided to use an orange juice carton, creamer carton, and 2 plastic milk jugs in two different sizes. We were going for variety, I guess! If you don’t have a bunch of empty containers, make sure you start collecting them for the next week.
Remember, be creative! The unique containers make very neat homemade birdhouses for kids. You can use water bottles, plastic 2 liter soda bottles in all sizes, milk cartons, lemonade cartons, creamer bottles, iced tea containers, etc. All sorts of containers will work – so just start saving them!
Homemade Birdhouse For Kids #1 – Using 1/2 Gallon Cardboard Beverage Carton
Supplies Needed:
- ½ Gallon Cardboard Juice Carton
- Popsicle sticks
- Acrylic Paint in preferred colors
- Paint brush
- Glue Gun
- Glue Sticks
- Scissors
- Glitter
- Circular Handheld Hole Punch
- 6-7” Stick from outside
- Twine
- Goo Gone (optional)
How To Make A ½ Gallon Beverage Carton Homemade Birdhouse
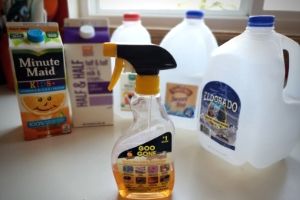
For our first two homemade birdhouses for kids we used ½ gallon cardboard juice and creamer cartons.
Step 1: Clean
The first thing you need to do is clean your carton and let it dry. If your carton has any stickers stuck to it, remove them with some Goo Gone.
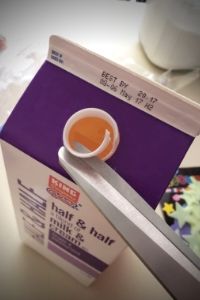
Step 2: Cut
Next, take off the lid and cut off the plastic part of the pour spout (if your carton has that). Some cartons have the fold and pour spout, and if so, then you can skip this step.
The reason you need to cut of the plastic pour spout is that it sticks up too far for the popsicle stick roof you will be putting on, so just cut the plastic down and don’t worry about putting the lid back on.
Step 3: Trace
Using a circular shaped bottle (like a glitter bottle) trace a circle on the front of your carton near the top and cut out with scissors. This will be the hole for your bird to enter your bird house.
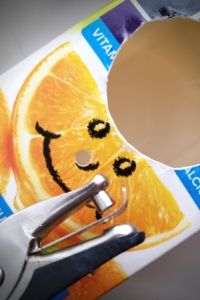
Step 4: Punch
Next, using a circular hole punch, punch a hole about ½” below the large circle you just cut out. This will be for a perch stick. Make sure your hole is in the middle so the perch stick will be centered.
You will need to squeeze pretty hard, as the cardboard can be a little thick.
Step 5: Paint & Glitter
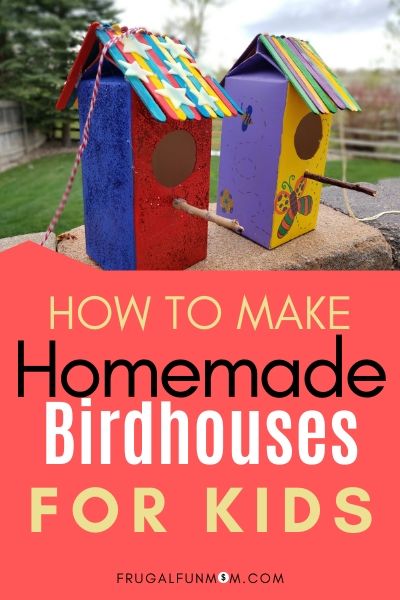
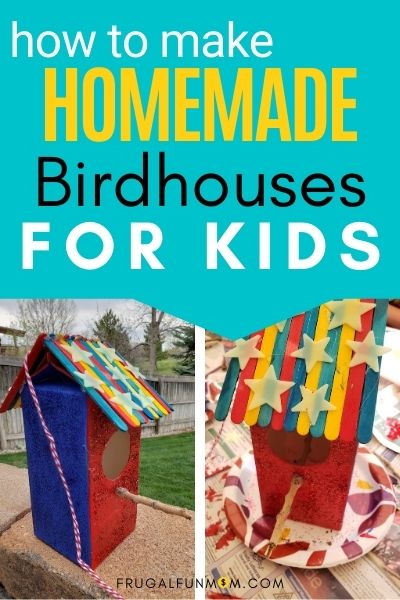
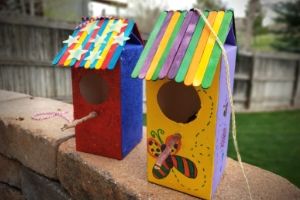
Now it’s time to paint! Using whatever colors you want, paint your birdhouse. We made 2 homemade birdhouses and painted one with an American Flag theme and the other one with a purple and green flower theme.
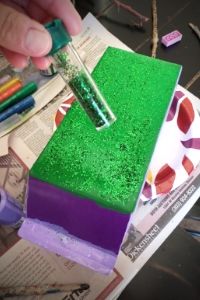
We chose to alternate the sides with different colors of paint and while the paint is still wet, we added glitter! You don’t have to use glitter, but you can, and it looks great! Make sure to sprinkle the glitter on while the paint is wet, or it won’t stick.
Step 6: Dry
After your birdhouse is all painted, let it dry.
Step 7: Paint Again
Paint your popsicle sticks whatever colors you want. You will need about 20-24 for your roof. If you don’t want to paint your popsicle sticks, you can buy colorful sticks. It’s up to you!
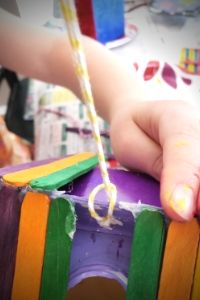
Step 8: Heat Up
Plug in your glue gun and get it heating up.
Step 9: String
Punch a hole in the top of the carton, right above the pour spout, in the middle. Insert a piece of twine, rope, yarn, fishing line, etc.
Whatever you want to hang your birdhouse with. You need to add this before you glue the roof on. Don’t make the same mistake I did – I added the roof first and ended up having to take it off in order to add my twine.
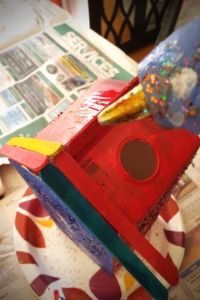
Step 10: Roof
Once your birdhouse is dry, it’s time to add the popsicle stick roof. Using the glue gun, glue the popsicle sticks right next to each other, on the top, making a roof.
I struggled with this at first, and managed to glue my sticks to high up on the roof on one side and then the other side didn’t fit. Just make sure you fit them right at the top of the carton line to make a roof top.
Step 10: Perch
Now, find a good straight stick that you can insert snugly into the small hole you punched in the front for the perch.
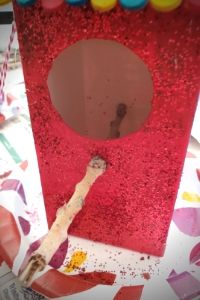
Add some glue to the end and push the stick all the way back into your carton so it’s gluing to the inside panel of the carton – so that the stick will stay in place securely.
Once it’s in place, add a little glue around the hole in front so the stick will securely stay in place.
Step 11: Decorate
It’s time to put your finishing touches on your homemade birdhouse for kids. We drew flowers and butterflies with glitter pens on one, and added glow in the dark stars to the other one that actually glow at night!
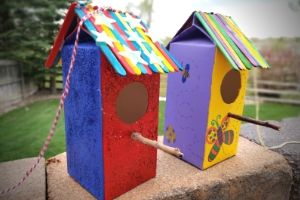
Use what you already have to decorate your birdhouse! Your kids will love this part! Get creative and let their minds go!
You are done!
WISH PLANNING A PARTY WAS A PIECE OF CAKE?

Now, go hang up your homemade birdhouse in your yard and watch for a bird to move in – hopefully!
Homemade Birdhouse For Kids #2 – Using 1/2 Gallon Plastic Milk Carton
Supplies Needed:
- ½ Gallon Plastic Milk Carton
- Plastic Funnel
- Glue Gun
- Glue Sticks
- Scissors
- Glitter
- Circular Handheld Hole Punch
- 6-7” Stick from outside
- Twine
- Goo Gone (optional – for removing stickers on your cartons)
- Perler Beads
- Spray Paint (2 colors)
- Drop Cloth
Suggestions Before You Begin:
After we finished making this homemade birdhouse, we decided it was our favorite one! We made this one up as we went along and absolutely loved how it came out.
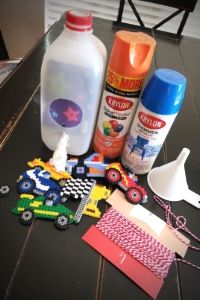
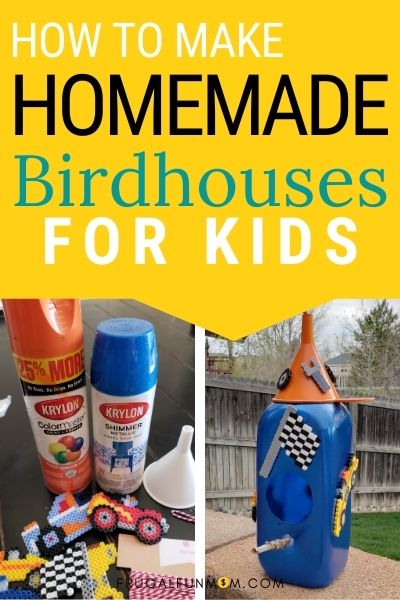
My kids love to play and create with Perler Beads. We have a big bag full of Perler Bead designs that have already been ironed just sitting in a bag, and before we made this birdhouse, we never knew what to do with our Perler Bead finished designs.
The finished Perler Bead designs we had gave us the idea to decorate the outside of this birdhouse with Perler Beads!
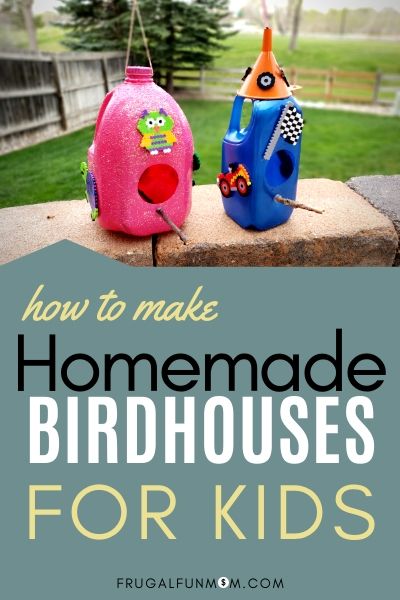
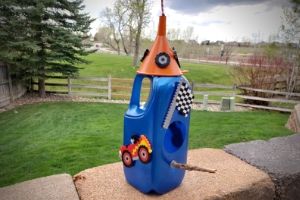
My son loves cars, so he wanted to decorate with a car theme. We just so happened to have, not only, a few car shaped Perler Bead designs, but also tires, a wrench, a hammer, and a checkered flag. We were all set to make a really cute car themed birdhouse!
I also have a bunch of spray paint leftover from other projects in our garage, and thankfully we found some fun colors – bright blue and orange, which went perfect with our already made, car Perler Beads.
Use What You Have
If you don’t have Perler Beads, that’s ok! Use what you have. Stickers, decals, pom poms, paint, rocks, gems, jewels, glitter, pipe cleaners, yarn, ribbon, etc. You can use all sorts of things to decorate.
Just dig through what you do have, before you go and buy anything else. If you like the Perler Bead idea, then make some fun designs and use them to decorate.
You also don’t have to spray paint your bird house, but it does make it look nice. We tried to use acrylic paint first and it just didn’t work well on the plastic, it kept coming off. Spray paint was quick and easy, plus it looked really neat!
How To Make a 1/2 Gallon Plastic Milk Carton Homemade Birdhouse
Step 1: Lid
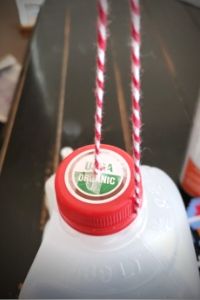
Save your lid. Poke a hole through the top of the lid and push a long piece of twine through only one end of the hole.
Part of your twine will be coming up through the hole and the other end will wrap around the side. Set your lid aside.
Step 2: Cut
Cut out a circle on the front of your carton for your bird to fly into.
Step 3: Punch
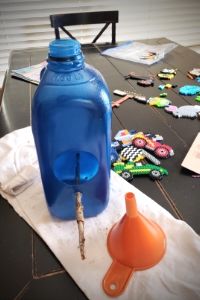
Using a circular hold punch, punch out a hole below the circle for a perch stick.
Step 4: Spray Paint
Take your carton and funnel outside and lay out a drop cloth. Then, spray paint your carton, making sure to get it well coated. Let it dry. We painted ours blue.
Using a different color, spray paint your funnel. We painted our funnel orange.
Step 5: Perch
Now, find a good straight stick that you can insert snugly into the small hole you punched in the front.
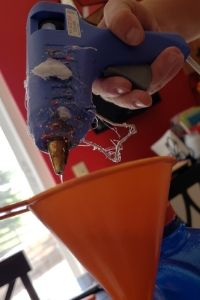
Add some glue to the end and push the stick all the way back into your carton so it’s gluing to the inside panel of the carton – so that the stick will stay in place securely.
Once it’s in place, add a little glue around the hole in front so the stick will securely stay in place.
Step 6: Attach Lid
Once dry, put glue on the inside of the lid and glue the lid back on to the carton making sure to hold the twine up and out of the way.
Step 7: Funnel
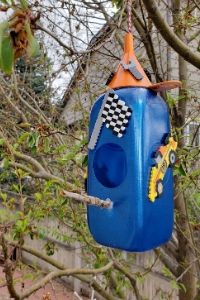
Next, thread the twine up through the top of the funnel and glue the funnel on top of the carton over the lid.
Step 8: Decorate
Now, add your decorations to the carton. We used Perler Beads that were car themed, and glued them all around the carton.
Step 9: Finish
Homemade Birdhouse For Kids #3 – Using a Gallon Sized Plastic Milk Carton
Supplies Needed:
- Gallon Sized Plastic Milk Carton
- Glue Gun
- Glue Sticks
- Scissors
- Glitter
- Circular Handheld Hole Punch
- 6-7” Stick from outside
- Twine
- Goo Gone (optional – for removing stickers on your cartons)
- Perler Beads
- Spray Paint
- Drop Cloth
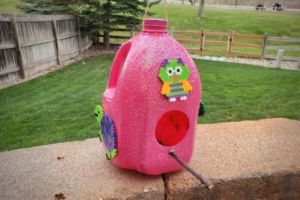
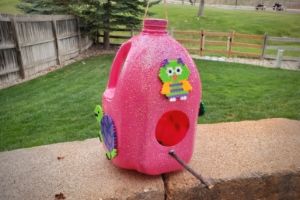
This homemade birdhouse is very similar to the last one, just a bigger shape. You will do a lot of the same steps as the ½ gallon plastic milk carton. I also had pink spray paint, so we decided to make this birdhouse for my neighbor because she loves the color pink!
How To Make a Gallon Sized Plastic Milk Carton Homemade Birdhouse
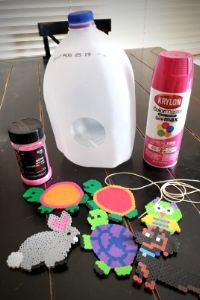
Step 1: Lid
Save your lid. Poke a hole through the top of the lid, but don’t push the twine through it yet. Put the lid back on the carton.
Step 2: Cut
Cut out a circle on the front of your carton.
Step 3: Punch
Punch out a hole below the circle for a perch stick.
Step 4: Spray Paint
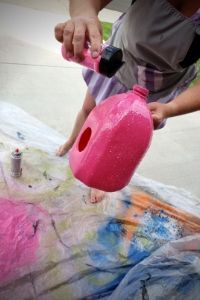
Take your carton outside and lay out a drop cloth. Then, spray paint your carton, making sure to get it well coated. Quickly, before it dries, sprinkle glitter all over the carton. We used pink spray paint and pink matching glitter. Let it dry.
WISH PLANNING A PARTY WAS A PIECE OF CAKE?

Step 5: Twine
Now that your lid is painted, take it off and push a long piece of twine through only one end of the hole and tie a big knot. Then, glue the lid back on the carton, making sure to pull up your twine securely.
Step 6: Perch
Find a good straight stick that you can insert snugly into the small hole you punched in the front. Add some glue to the end and push the stick all the way back into your carton so it’s gluing to the inside panel of the carton – so that the stick will stay in place securely.
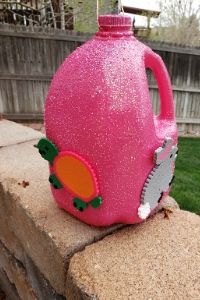
Once it’s in place, add a little glue around the hole in front so the stick will securely stay in place.
Step 7: Decorate
Now, add your decorations the carton. We used Perler Bead animals (like turtles, an owl, and a puppy) and glued them all around the carton.
Step 8: Hang Up
That’s it! Now, go hang it up outside! Or, give it to one of your neighbors!
There you have it! Three very fun, and frugal homemade birdhouses for kids to make! Promise me, that if you decide to make these, you won’t spend a bunch of extra money on supplies and you will create something fun with things you already have? Right?! Of course, if you just don’t like the stuff you have lying around at home, you can order whatever you need from Amazon.
I can’t wait to see what you come up with! If you make a birdhouse, make sure to upload a photo and tag me on Instagram or Facebook! Now, go for it! Have some frugal fun with your kids today!
More Fun Activities For Kids
- How To Make A Sidewalk Chalk Mosaic
- How To Make Homemade Chalk
- Cookie Cutter Bird Feeders – Easy Craft For Kids
- Kids Outdoor Tic Tac Toe You Can Make 3 Easy Ways
- Grow Seeds Indoors With Kids
Want to remember this post? Pin this post, Homemade Birdhouses For Kids To Make, to your favorite Pinterest board right now!

